TUTORIAL: homemade etch a sketch mouse with Raspberry Pi Pico
By Sarah
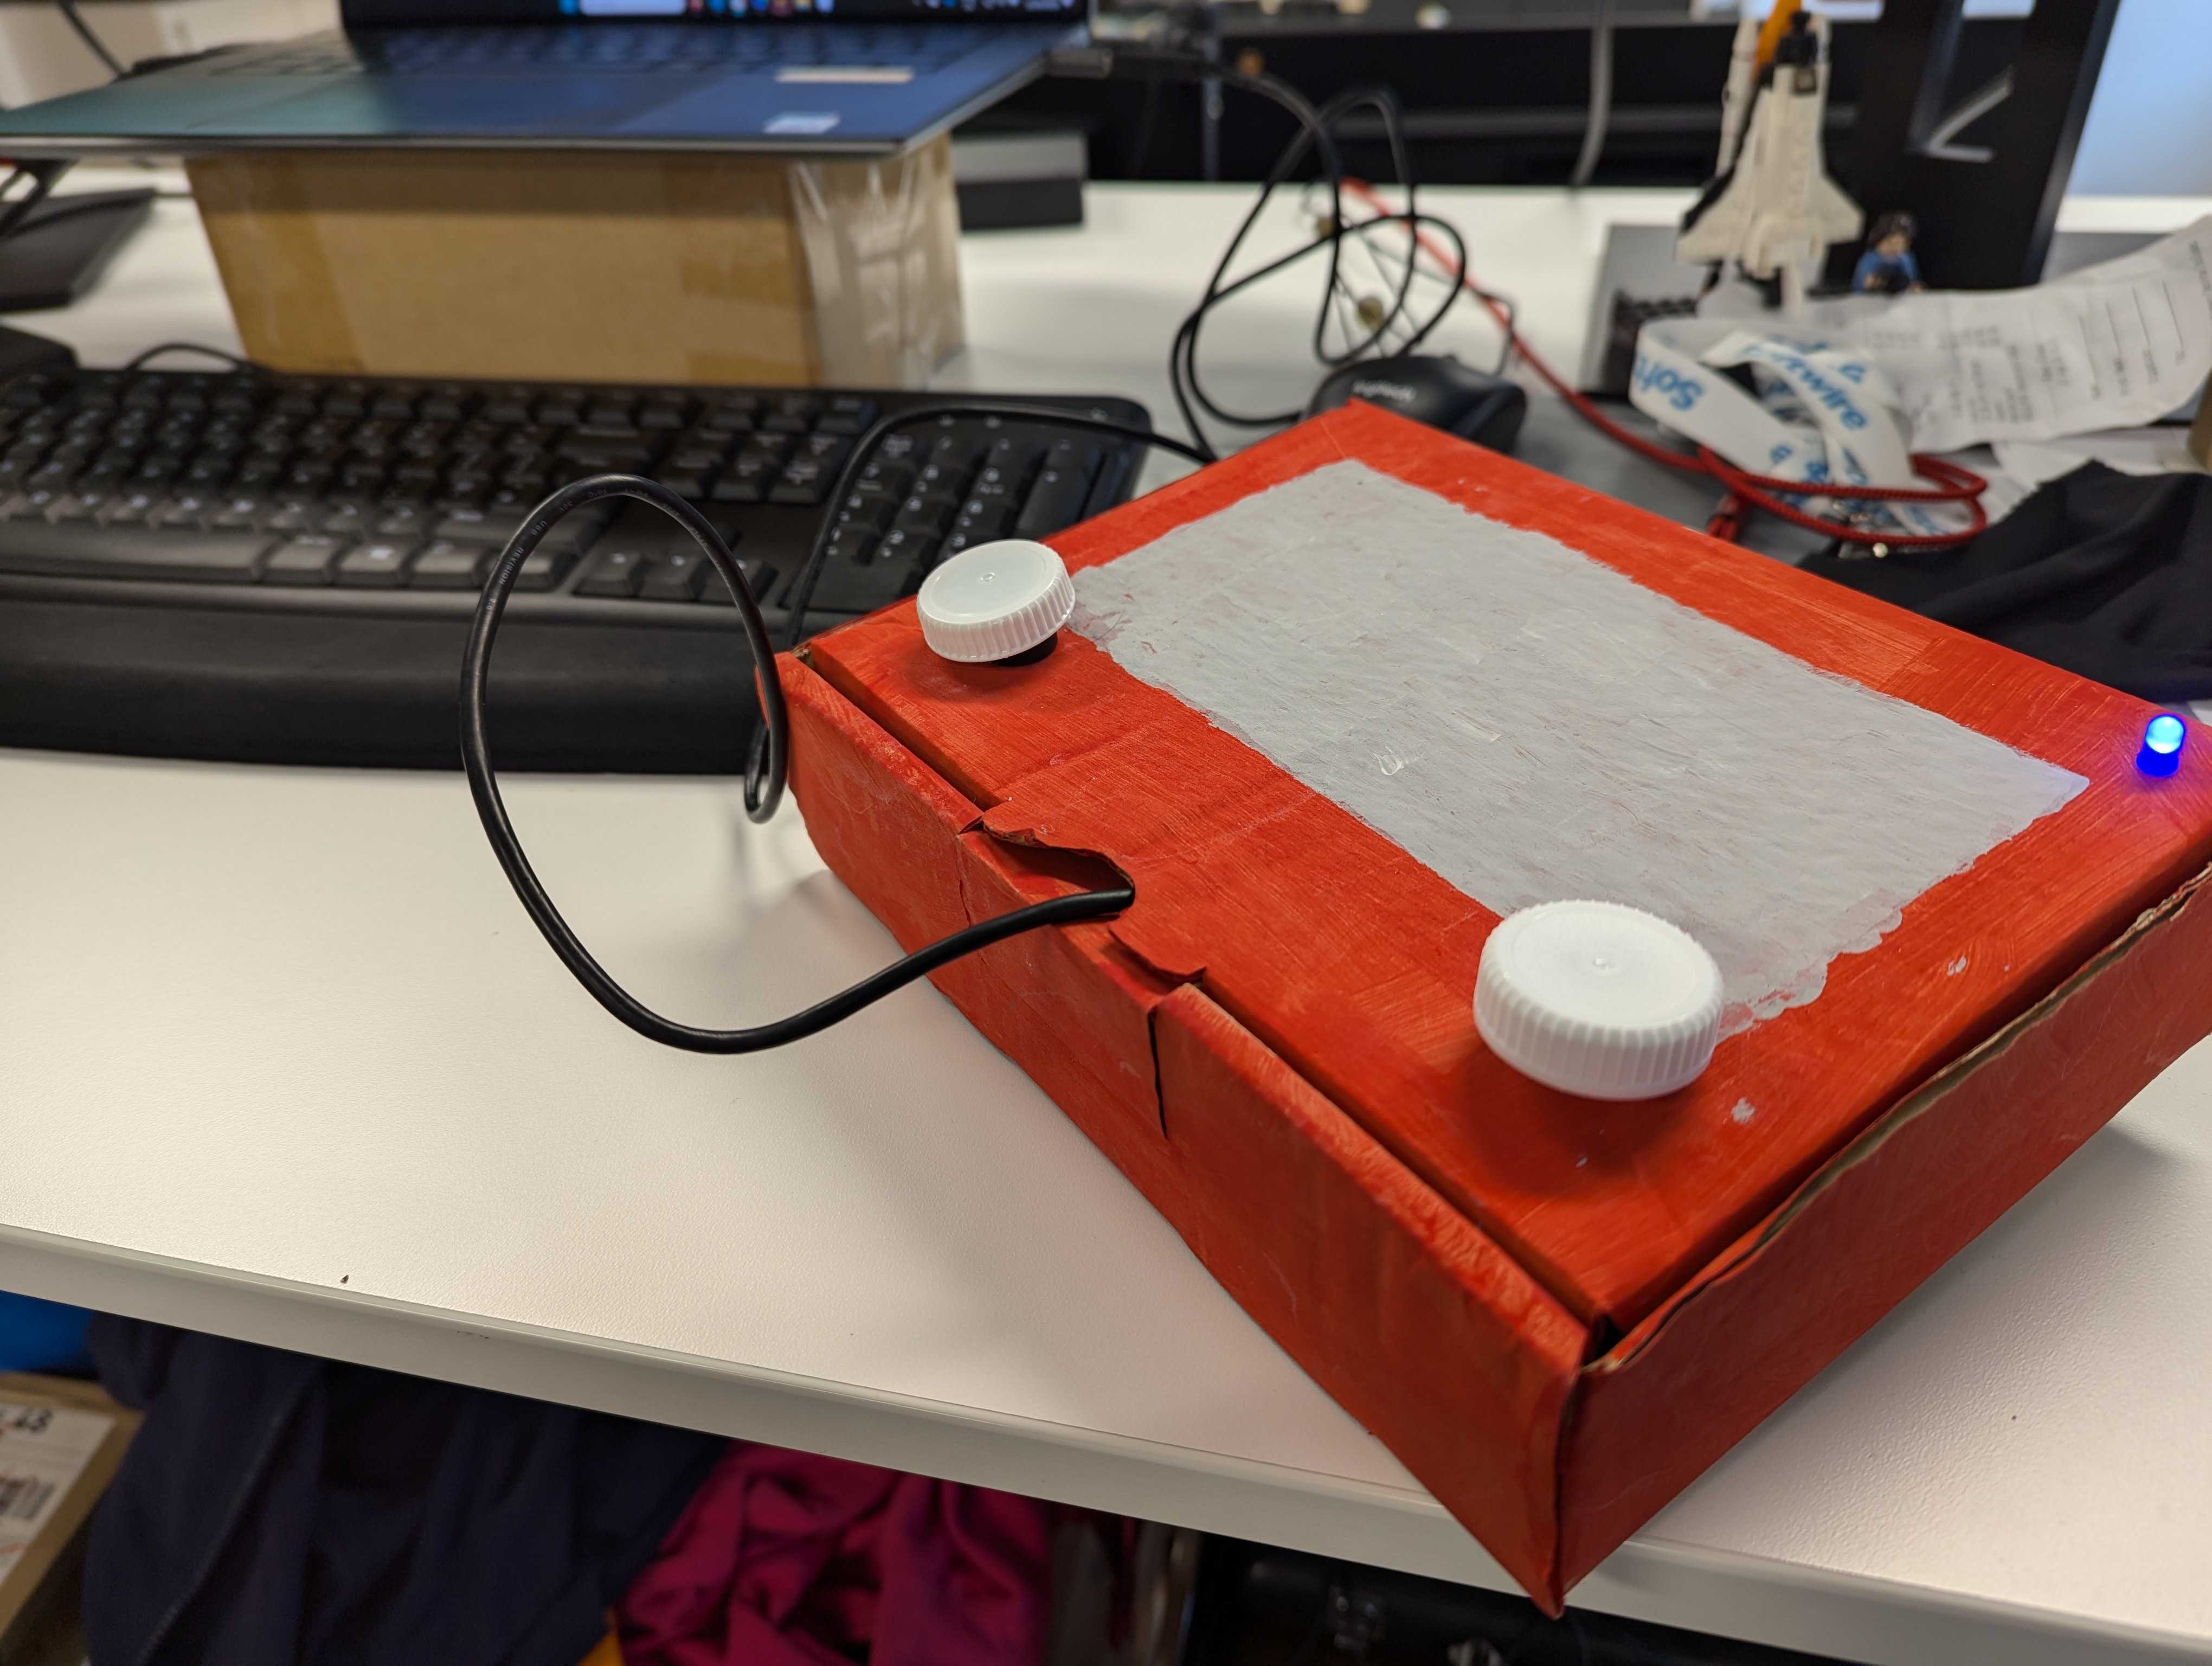
I don't have a good explanation for why you'd want to build this
THE DREAM
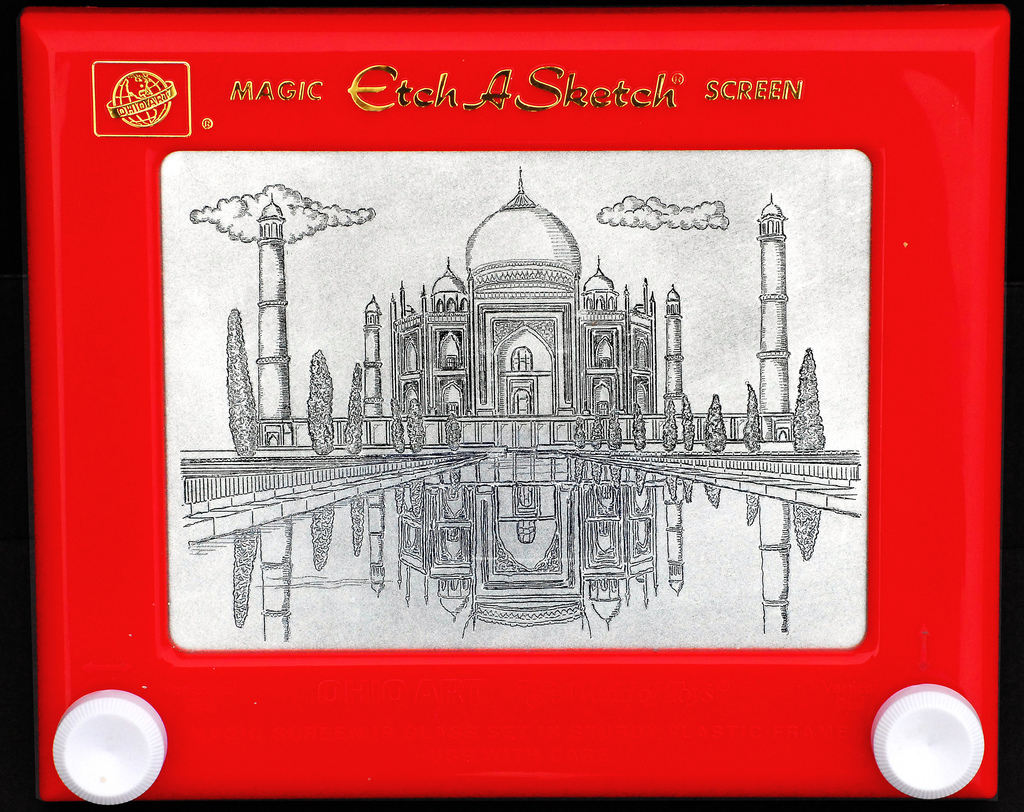
What if this but computer mouse
Buy the components
You will need:
1x Raspberry Pi Pico. I bought a headered one from thepihut.com for £4.80. Or grab a headerless one if you like soldering.
1x Micro USB cable. Like the kind you used to use to charge your phone before you got a new phone with a USB-C port. This will connect your USB mouse to your computer.
- Note: Not all Micro USB cables are equal; yours needs to be able to carry data as well as power. It'll work for our purposes if when you plug a phone into your computer with it, the computer recognises it as a phone as well as the phone starting to charge. If in doubt, one of these will do.
2x Rotary Encoders. Important! Check whether you're looking at a Rotary Encoder or a Potentiometer. Rotary encoders spin all the way around as many times as you like. Potentiometers only go around like 270° of the circle. Look for ones which have a push-button built in.
Some decent jumper wire, I went with this pack of dupont wire again from thepihut I swear they aren't paying me
Two (2) of these lil' mini breadboards and one decent sized breadboard, or an equivalent chunk of stripboard if you like soldering
Optional: an LED (any colour) and a resistor (size not that important - I chose a tiddly 330Ω)
A cardboard box. Size? Shape? Whatever. It needs to look like an etch a sketch.
Red poster paint
Silver poster paint, or black and white
Paintbrush
Blu-tak or glue
2x white bottle caps. I used the caps from two cartons of orange juice (with bits, in case you were wondering). Maybe wash them first
A computer, obviously, I don't have any particular recommendations here, you do you
The build
Now we at dreamcat take puzzlehunt build quality very seriously, but this isn't a puzzlehunt it's an etch a sketch so we are going with the blue peter approach
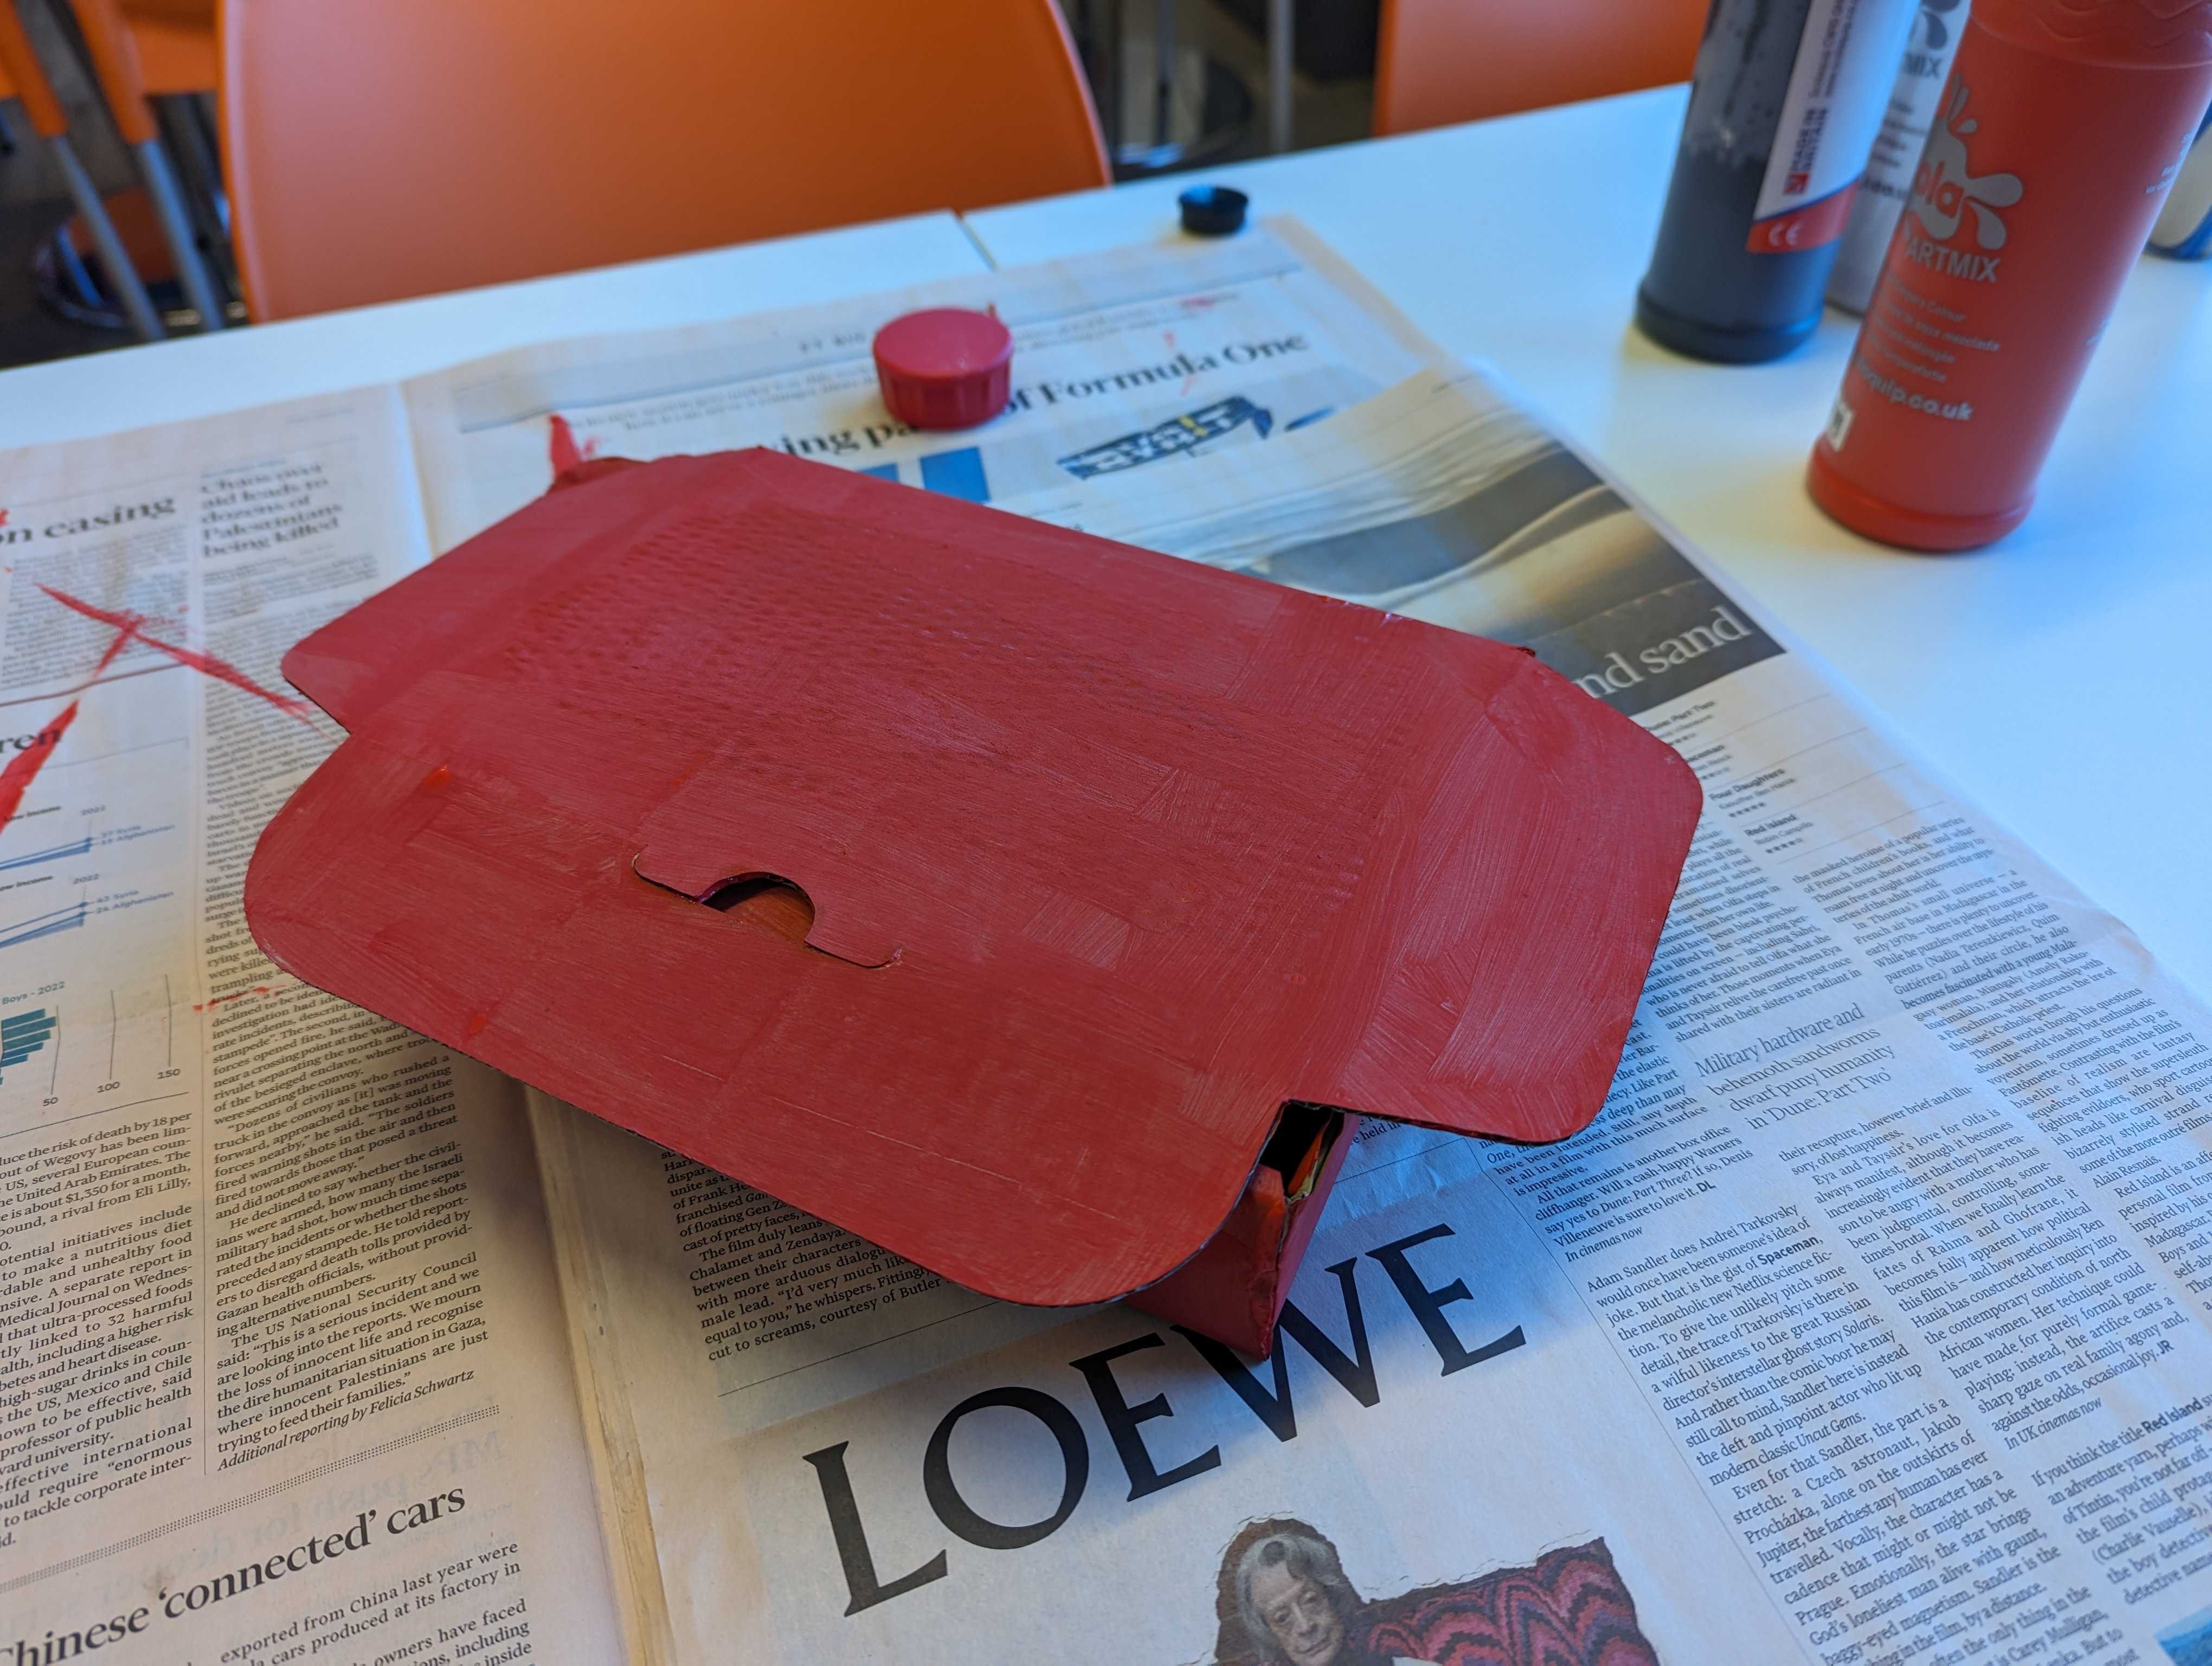
- Paint the box red, preferably on top of a newspaper ad of disapproving Maggie Smith
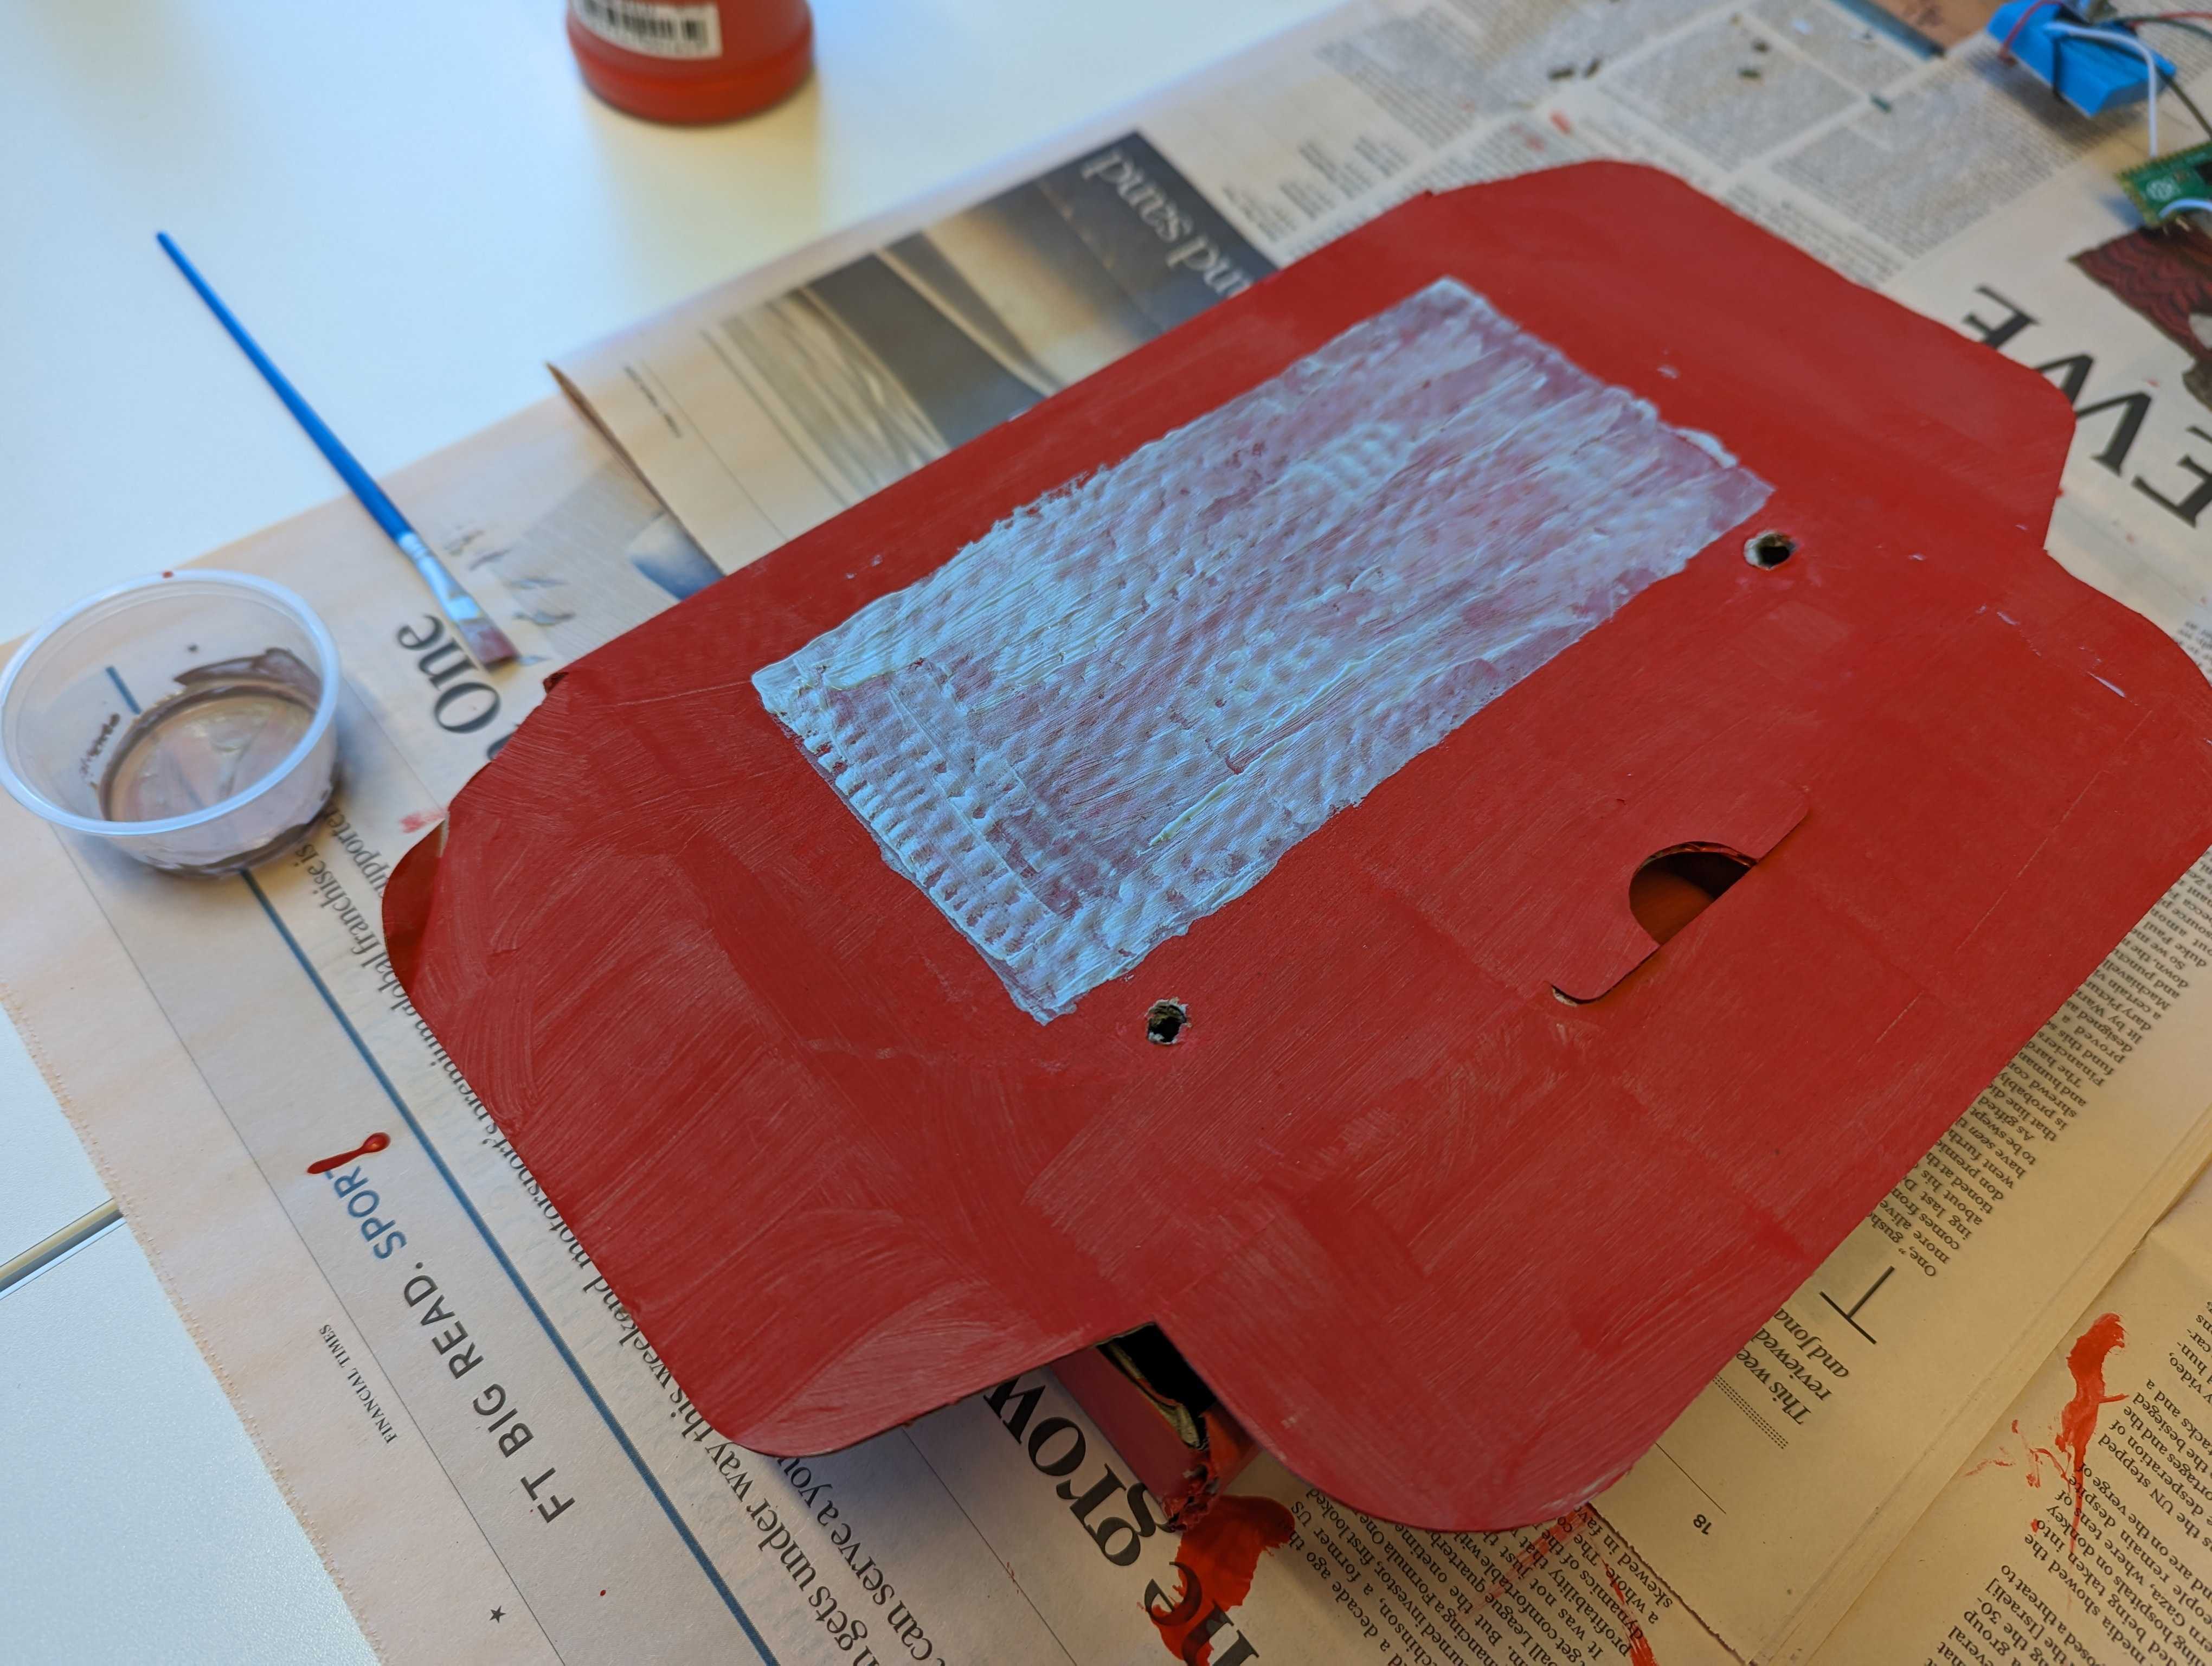
- Measure out where you want the silver "screen" to go and paint that on in grey. Might need multiple coats
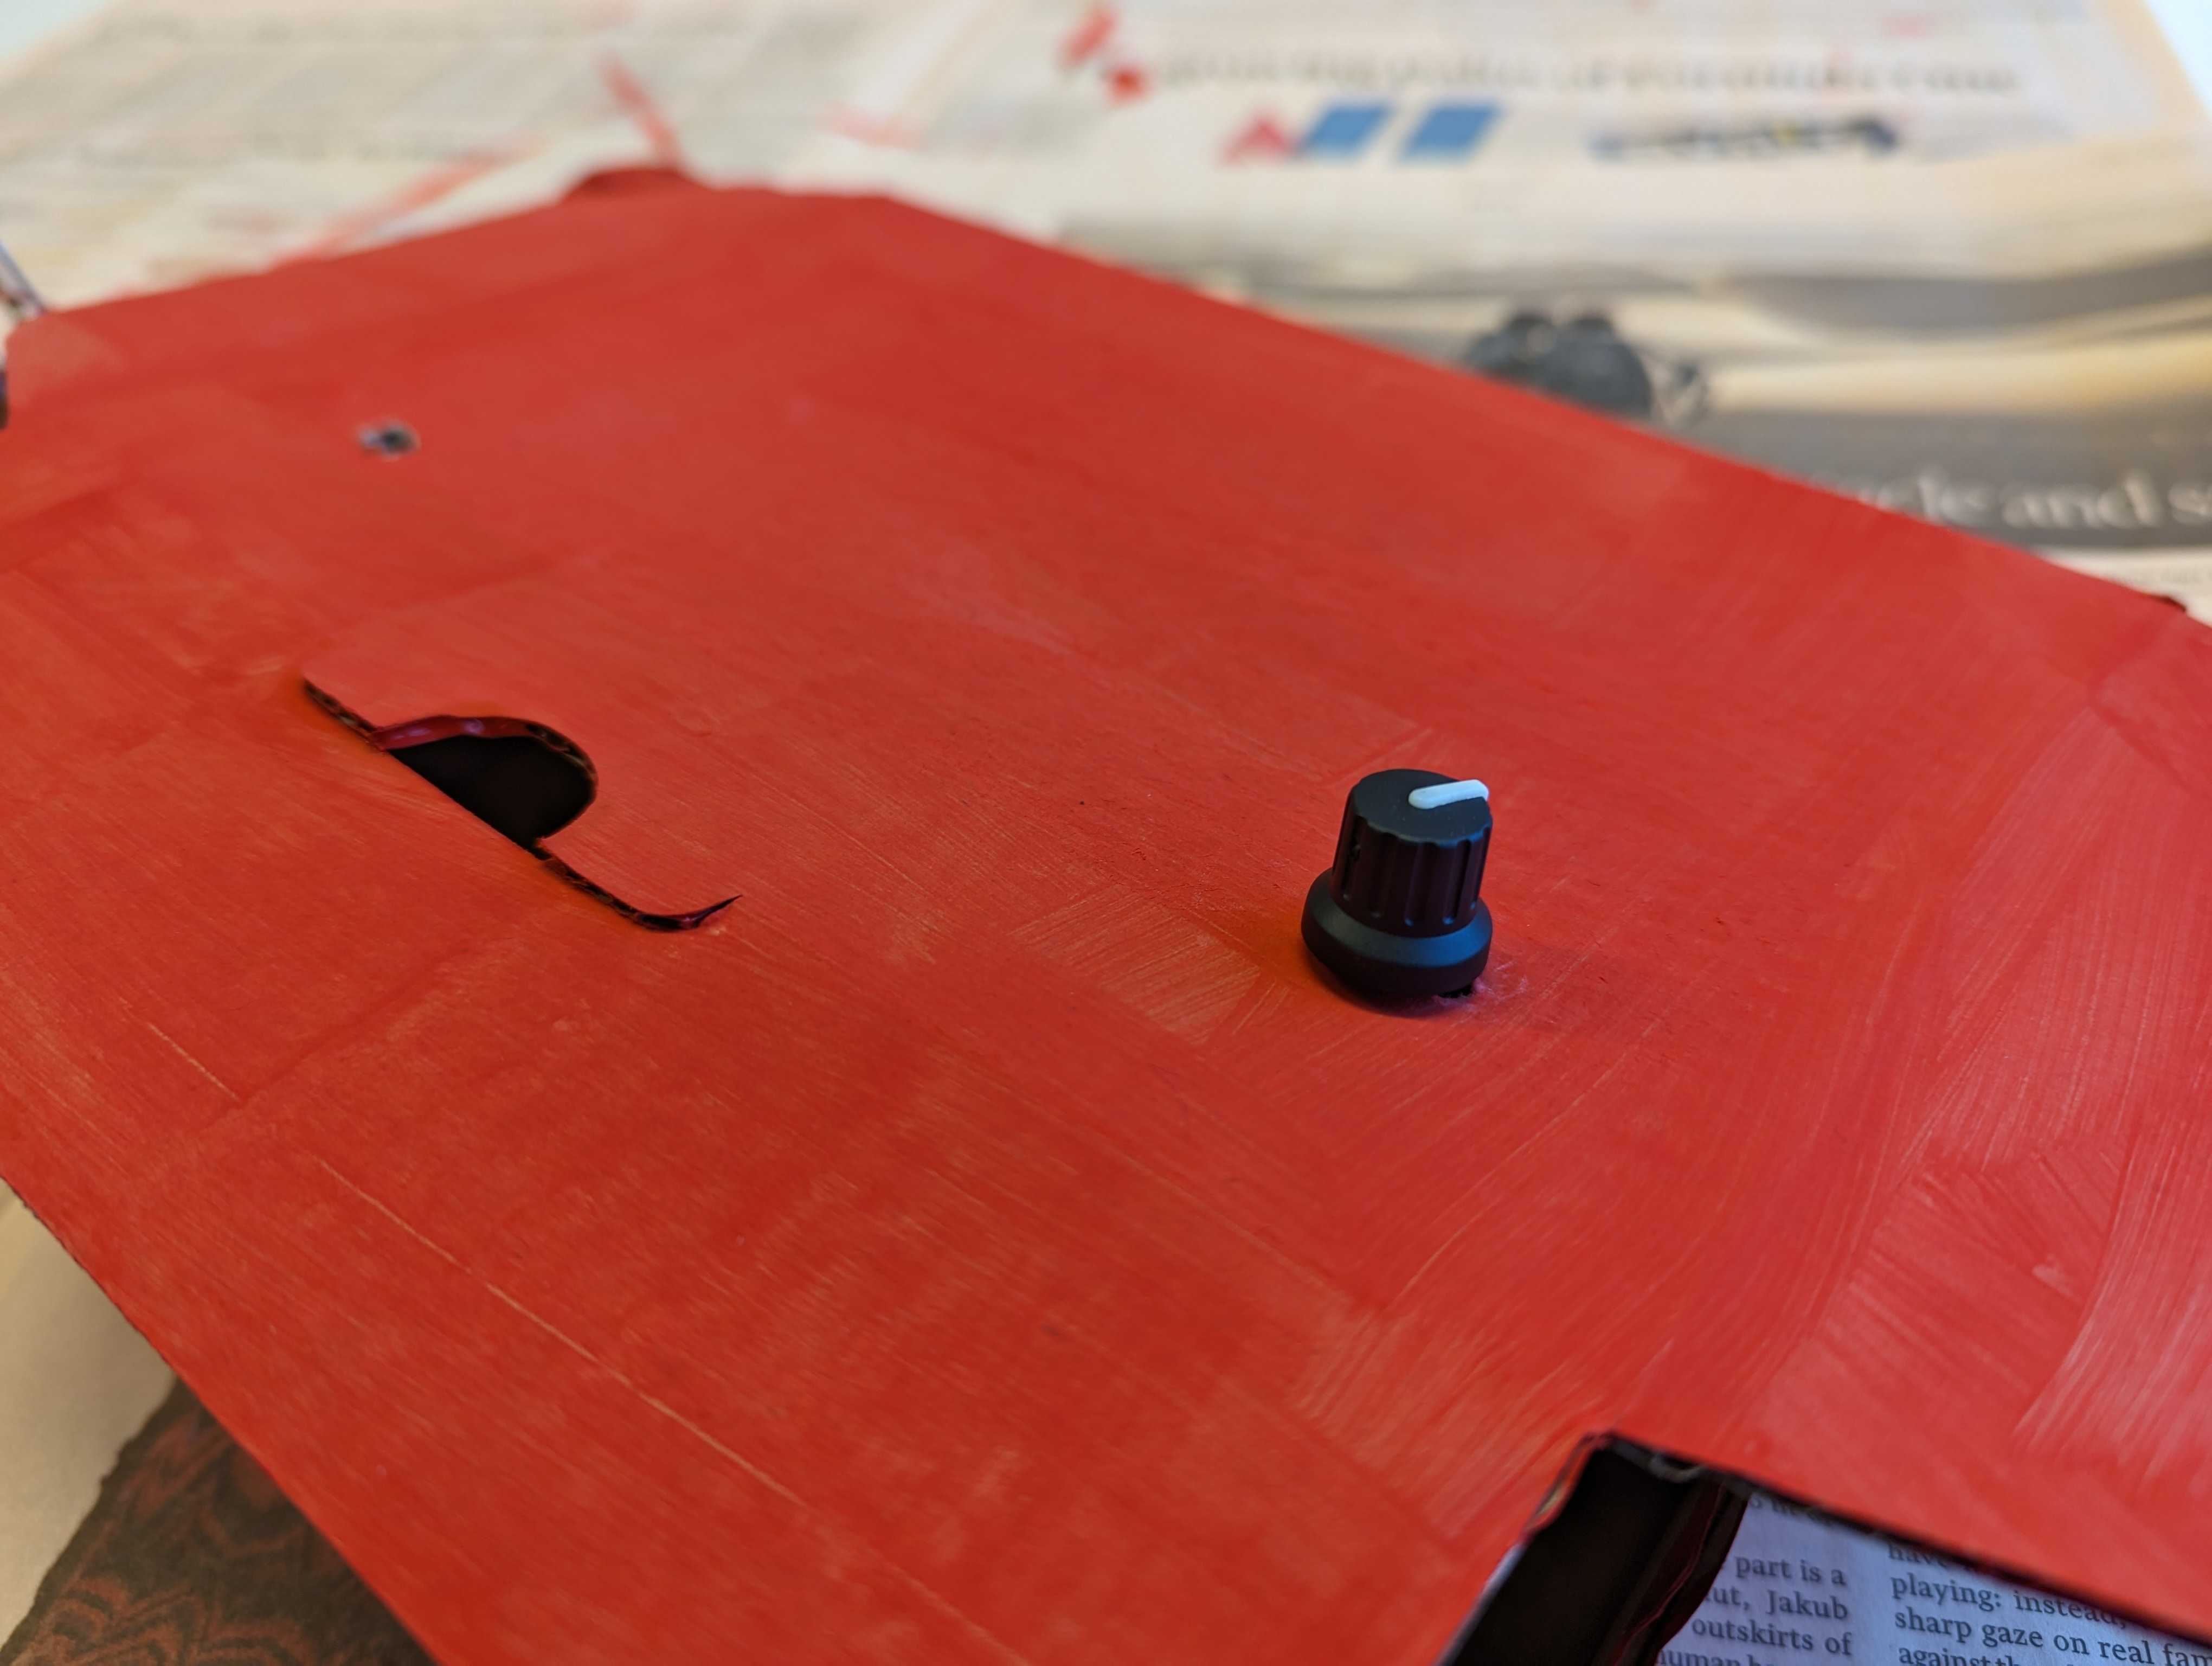
- Cut a couple of small holes in the box and screw in the rotary encoders. Mine came with a little nut and ring to hold it neatly in place. Once it's in you can slide on the cap and turn it. It should feel nice and clicky. Click click click
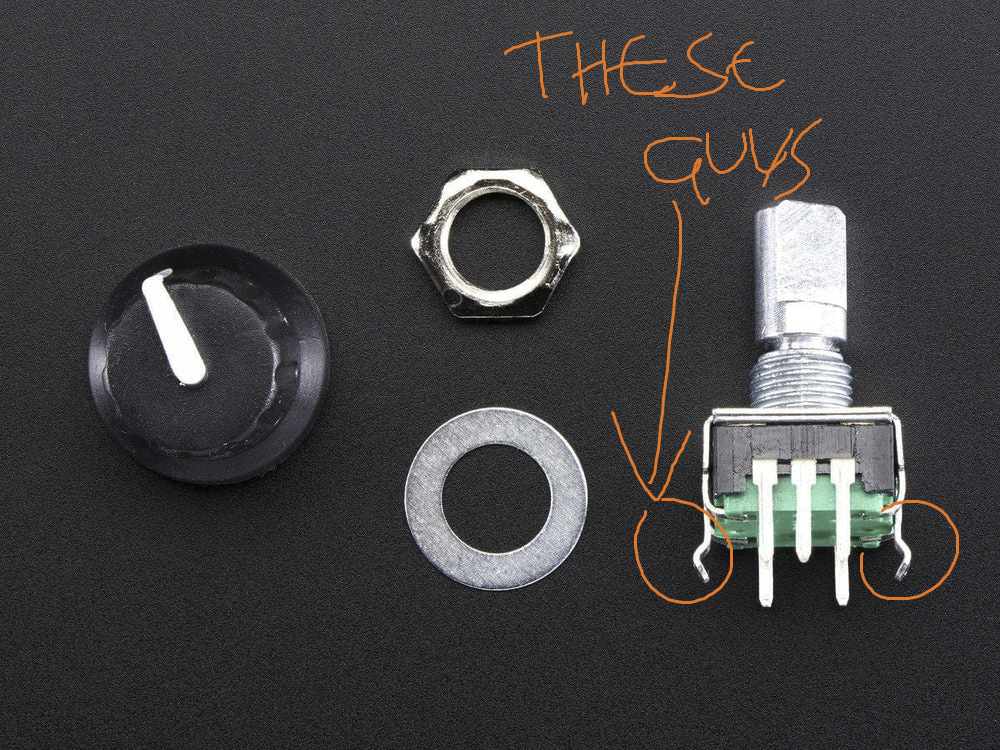
Snap each rotary encoder into a lil' breadboard. You'll be sticking your jumper wire in here. Or if you like soldering, stick it in a bit of stripboard and solder it in securely.
Now you might find your rotary encoders have a couple of legs sticking out - if you got the right kind of breadboard those will fit neatly down the trench in the middle, but otherwise you can bend them out of the way with pliers so the board lies flat.
Blu-tak or glue a bottle cap onto the rotary encoder knob so it looks like an etch a sketch
Now I hope you got rotary encoders which have a built-in push button, since we're gonna be using that for the "click". Try pressing the rotary encoder into the box. You feel a click, right? But it probably presses the cardboard in, too. Boo. What you're gonna need to do is find something to brace against the base of the box. I honestly don't know what to suggest to you here. I used two plastic tubs that used to have sauce in, cleaned them up, glued them shut and stuck them to the base of the box. Reduce, reuse, recycle and all that. Now when the lit is shut you can press the rotary encoder in and it feels nice and solid.
Stick your Pi Pico into the bigger breadboard and set it in the middle of the box.
Optional: Stick a lil' LED into the top corner of the box. If you're feeling ultra fancy (and with such high quality cardboard, who wouldn't?) then you can put it in a dedicated plastic holder, like this. I didn't do that. I literally stuck the two legs of the LED through the cardboard.
Wiring
Pick yourself some particularly juicy dupont wires and connect up the three circuits you need. They will be:
The LED, this is the easy one
The rotary encoder button press
The rotary encoder spins
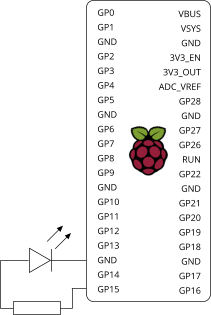
Starting out with the LED: stick a couple of female Dupont wires right on the ends of it. (This is flimsy as heck so if anyone has any better ideas that don't use a whole breadboard up do shout.) Connect one end up to ground and the other to a resistor and thence to pin 15 on your Pico.
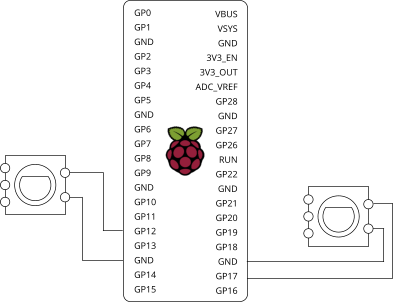
Next it's the button press on the rotary encoder. This is the side of the rotary encoder that only has 2 legs on it. You guessed it - when you click the knob inwards, they connect up. So you just need to connect them each up to a GPIO pin and to ground, respectively. I've chosen GPIOs 12 (for the right knob) and 17 (for the left).
Finally let's do the actual rotary encoders themselves. The way these work is there are 3 pins, two for the turning of the encoder ("A" and "B") and one for ground. Ground is in the middle, A is on the left and B is on the right.
| Left encoder | Right encoder | |
| A | GP19 | GP3 |
| B | GP18 | GP4 |
| Ground | GND | GND |
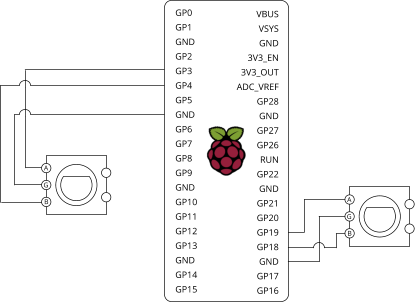
Stick em together what do you get:
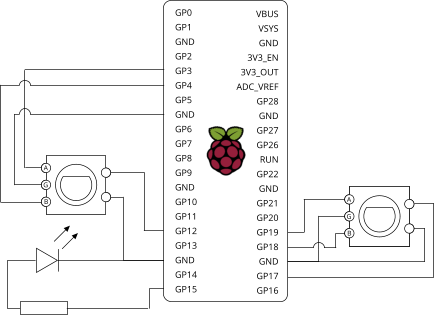
You can now connect your Pi Pico up to the Micro USB cable, thread the other end of the cable through the box lid (make a hole if you need to) and close the box.
Software
OK this is the actual magic bit. We are going to be using a Python library called adafruit_hid which lets the pi pico simulate being a Human Interface Device (HID) like a keyboard or a mouse.
First, install CircuitPython on the Pi Pico (the HID library requires this rather than micropython).
(You can skip this bit if you've got CircuitPython already and a preferred editor)
Download the .uf2 file from https://circuitpython.org/downloads
Press and hold the
BOOTSELbutton on the Pi PicoWhile you're holding
BOOTSEL, plug the Pi Pico into your computerIt should show up under My Computer, like it was a USB stick.
Copy the .uf2 file onto the Pico drive
Whoa it disappeared!
Well actually it's coming back but this time as a CircuitPython device rather than an empty drive.
Download Mu editor
Open Mu. It should recognise you have a Pi Pico plugged in.
Now install the adafruit_hid package. Mu users can follow this guide.
Code
Copy and paste away:
import digitalio
import board
import usb_hid
from adafruit_hid.mouse import Mouse
import rotaryio

# Set up the left hand rotary encoder.
encoder_L = rotaryio.IncrementalEncoder(board.GP19, board.GP18)
last_position_L = 0
button_L = digitalio.DigitalInOut(board.GP17)
button_L.direction = digitalio.Direction.INPUT
button_L.pull = digitalio.Pull.UP
button_L_state = None

# And the right hand rotary encoder.
encoder_R = rotaryio.IncrementalEncoder(board.GP3, board.GP4)
last_position_R = 0
button_R = digitalio.DigitalInOut(board.GP12)
button_R.direction = digitalio.Direction.INPUT
button_R.pull = digitalio.Pull.UP
button_R_state = None

# Use adafruit_uid library to set up the Pico as a mouse:
mouse = Mouse(usb_hid.devices)
mouse_speed = 10

# Now we have the rest set up, switch on the
# indicator light to say the mouse is ready to use:
led = digitalio.DigitalInOut(board.GP15)
led.direction = digitalio.Direction.OUTPUT
led.value = True

print("start!")

while True:
    position = encoder_L.position
    if last_position_L != position:
        print("L: " + str(position))
        # Traditionally on an etch a sketch, the left wheel
        # moves horizontally...
        mouse.move((last_position_L - position) * mouse_speed, 0, 0)
    last_position_L = position

    position = encoder_R.position
    if last_position_R != position:
        print("R: " + str(position))
        # ...and the right wheel moves vertically
        mouse.move(0, (last_position_R - position) * mouse_speed, 0)
    last_position_R = position

    # Left click:
    if not button_L.value and button_L_state is None:
        button_L_state = "pressed"
        mouse.press(1)
    if button_L.value and button_L_state == "pressed":
        mouse.release(1)
        button_L_state = None

    # Right click:
    if not button_R.value and button_R_state is None:
        button_R_state = "pressed"
        mouse.press(2)
    if button_R.value and button_R_state == "pressed":
        mouse.release(2)
        button_R_state = None
Et voila:
If you enjoyed this you might enjoy our puzzles, which can be experienced whenever EMF Festival comes around again. None of them are etch a sketch themed though.